
Did you know that you can switch languages in Windows Live without having to reinstall the Essentials suite? In this tip, let’s take a look how this works:
1. Exit any running programs of Windows Live Essentials (e.g., Messenger, Mail, etc).
2. Click Start, Computer. (Windows XP: Start, My Computer.)
3. Open Local Disk (C:), Program Files, Windows Live, Installer.
4. Double click the LangSelector.exe file.
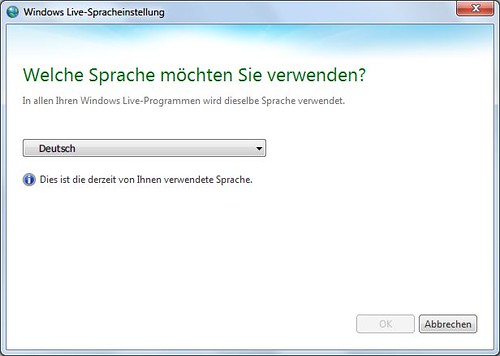
5. In the appearing window, choose your favorite language.
6. Now click OK to confirm your change. If the language pack is not yet installed, it gets downloaded automatically.
7. As soon as the progress dialog has closed, you’re ready to use Windows Live Essentials in the changed language!
You may change languages as often as you want to, without rebooting your computer. To follow the steps above, you need to have Windows Live Essentials 2011 (15.4) installed. This version is available for free download at [download id=22] and runs on Windows 7 and Vista.
Did this work for you?
Stay tuned for weekly tips about Windows Live!
The Control panel provides the option for language settings for Windows Live
Control Panel > Clock, Language and Region > Windows Live Language Setting.
which in turn run the file LangSelector.exe which you had mentioned
For all the screenshots about this please check-
http://www.thewindowsclub.com/how-to-switch-languages-in-windows-live-essentials-2011